Migrating your application to Angular v9
It's hard to believe the next version of Angular is already in the stage of release candidate. At Cazton, we have been testing the stability of this new version and migrating applications of versions and sizes to the latest version available (v9.0.0.rc.1). In this article, we will guide you through the basics on how to migrate your current application and we will help you tackle common issues you might encounter along the way.
Pre-requisites
Before starting with the actual migration some preparation is necessary.
Update your Nodejs version
- First, you will need to update to the version which Angular is compatible (NodeJS 10.13 or later).
- Uninstall the version that you are currently using.
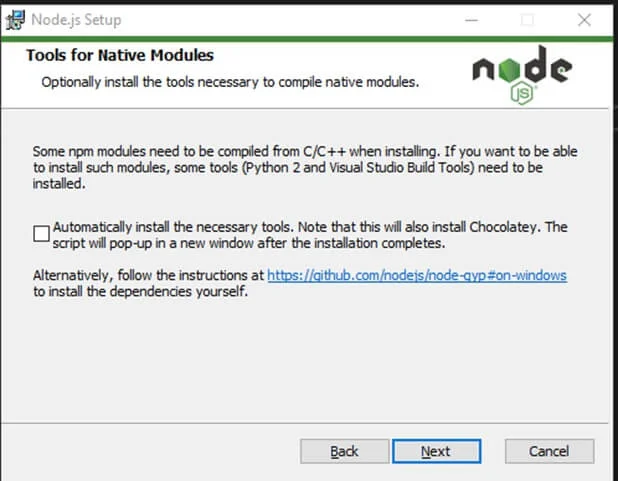
- Then go to https://nodejs.org/en/download/ and download the latest version available.
- You may check the option to install the build tools if you wish, but it is not necessary. Installing the tools is a good idea if you think you may want to use a package manager with node.js in the future.
Use Yarn as your package manager:
As of the writing of this article, the version npm installed by the latest node.js is not stable. We recommend downloading and installing the latest version of yarn from https://yarnpkg.com/lang/en/docs/install/.
If you have a version less than v8 upgrade to the latest v8.x before starting
To minimize conflict DO NOT attempt to migrate across several versions. It can get really messy since there are some breaking changes between versions.
The Angular team provides a useful resource to help you through this process: https://update.angular.io/.
The Migration
In this section of the article, we are listing the basic steps for an ideal installation.
Clean your files:
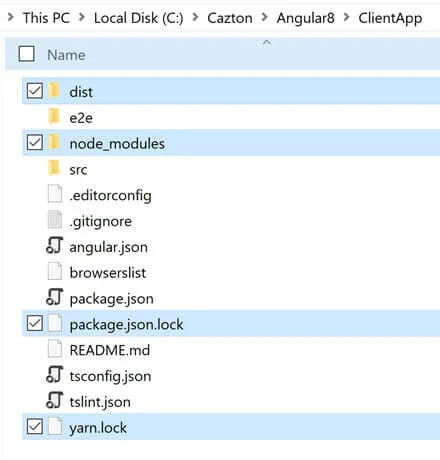
We recommend deleting the packages already installed to avoid conflicts. Delete the highlighted directories/files in your Angular application root folder:
Open your shell on Angular's root directory:
> cd C:\Cazton\Angular8\ClientApp
Clean the cache
Execute the following command on your shell to clean your package manager cache:
> yarn cache clean --force
Reinstall the packages
Execute the following command:
> yarn install
Update you Angular v8 application to the latest v8.x
Execute the following command:
> ng update @angular/core@8 @angular/cli@8 --allow-dirty
Usually this Angular cli will ask you to commit your changes in your git repository before updating. The parameter --allow-dirty lets us override this requirement.
Verify installed version 8 (optional)
You should check that your application is building and running before continuing on to the next step. Also, take note of the load speed and bundles size for later comparison.
> yarn run build
Clean the cache once again
> yarn cache clean -force
Update Typescript to v3.6.4
Execute the following command:
> yarn global install typescript@latest
Migrate to V9
Until the release of version 9 is official the parameter --next is used instead of specifying the version.
> ng update @angular/core @angular/cli --force --allow-dirty --next
Verify installed version
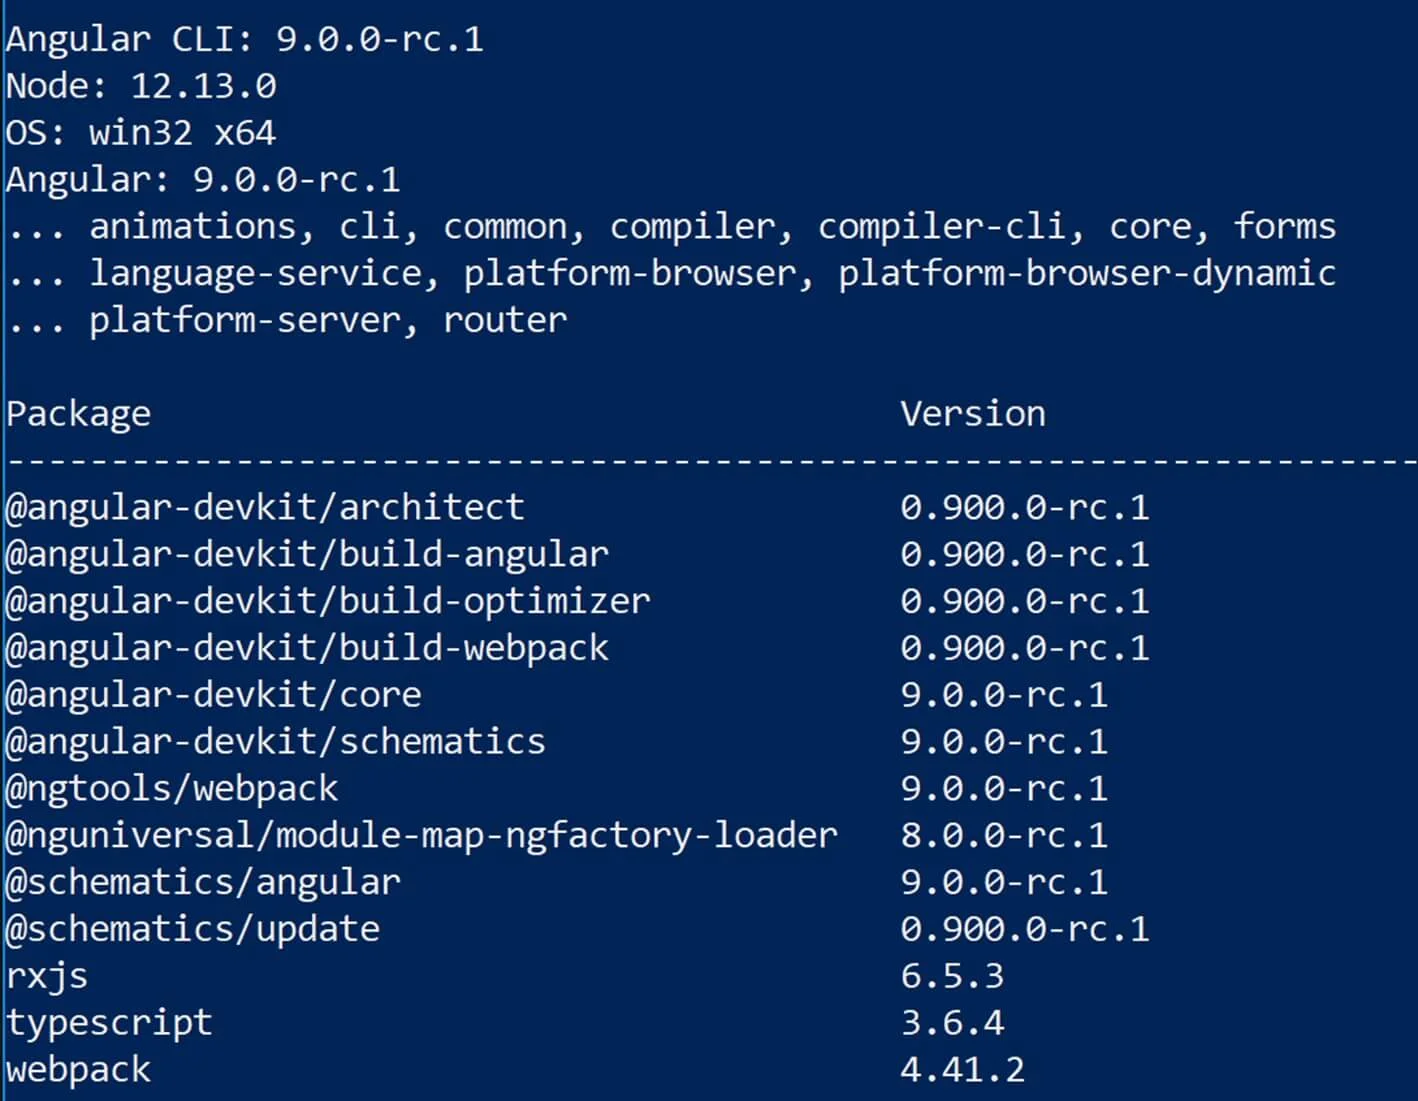
> ng version
It should look something like this:
Great Job!
If you got all the way here, congratulations you did it!
You can now build and run your application. Even though the upgrade process is supposed to automatically replace deprecated components from your source code, you might still need to do some manual adjustments.
If you found a couple of unexpected issues, jump to the troubleshooting section of this article to find some workarounds.
Troubleshooting
Below you will find a brief list of the issues that can occur during the migration process.
If you are working in a secure corporate proxy network... You might encounter some SSL authentication issues while installing packages and downloading files.
> error An unexpected error occurred: "https://registry.yarnpkg.com/angular: SSL Error: UNABLE_TO_GET_ISSUER_CERT_LOCALLY"
Option #1: Use the following command to disable SSL verification for the duration of the migration (unsafe). Remember to set this value to try right after finishing the migration.
> yarn config set strict-ssl false
Option #2: Configuring certificate while SSL authentication is true (recommended).
  > yarn config set strict-ssl true
 > yarn config set cafile C:\Users\youruser\.certificates\yourcertname.crt
 > yarn add packagename
If your application was created with .Net Core CLI...
For the purpose of preparing this article, we tested the migration with a simple out of the box DotNet Core v3 single page application created with the dotnet CLI.
The application was created with the following command:
PS C:\Cazton\Angular8\ClientApp> dotnet new angular -o Angular8
The dotnet CLI create an angular v8.0.6 application that had some issues when trying the migration.
Issue#1: When trying to build the angular application the following error was thrown:
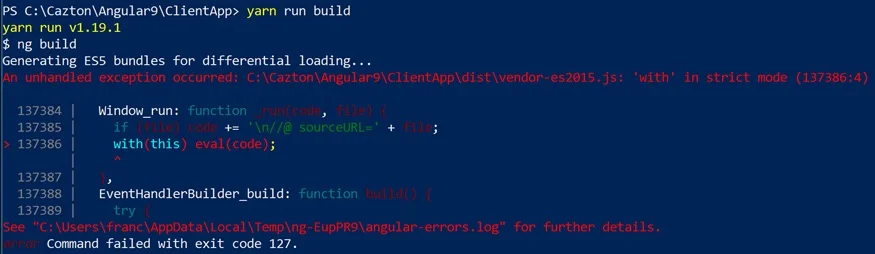
For some reason the command ng build throws an illegible error in this case. Use yarn for the build and you will see the error message seen above.
Solution: change the tsconfig.ts to make the compiler target ES5 instead of ES2015:
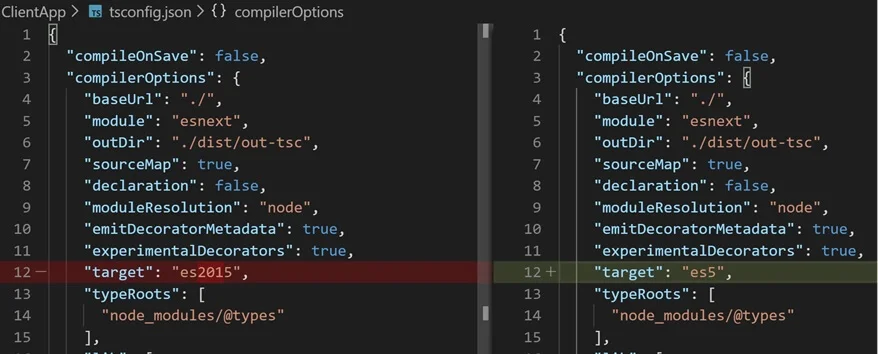
This will affect the compilation process using a different standard to build the bundles, possibly affecting their size. Don't do this step unless absolutely necessary.
Issue #2: After building the angular application successfully the application throws an error during load:
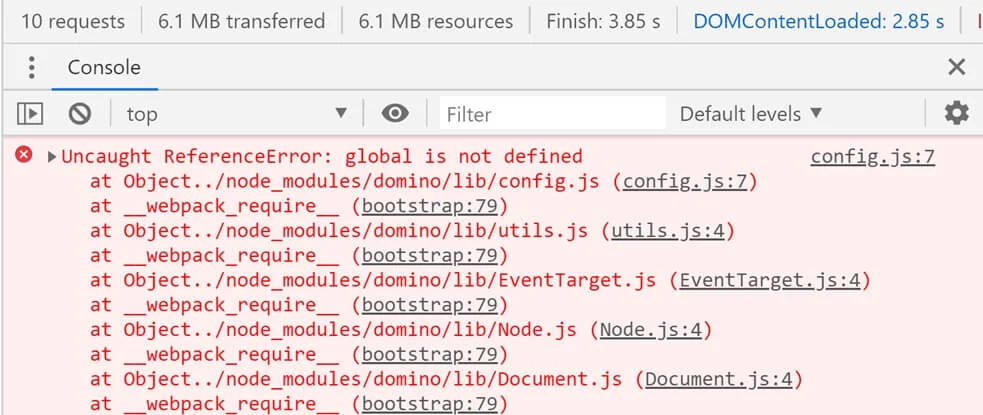
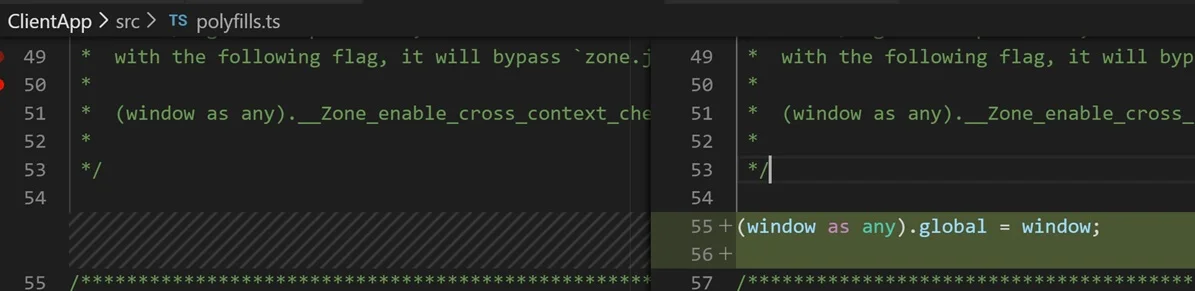
Solution: edit the file polyfills.ts and define global as follows:
Conclusion
The process results may vary depending on the size, the complexity and the version that you start your migration from. The Angular team is actively working on making the process as straightforward and seamless as possible, and every couple of days new version 9.0.0.rc.x is available with new fixes.
Let us know what your experience is with the migration and what challenges you find. We will keep updating new tips until the version 9 is stable.
Stay tuned for our next post that will be dedicated to the bundle size and rendering performance.
Cazton is composed of technical professionals with expertise gained all over the world and in all fields of the tech industry and we put this expertise to work for you. We serve all industries, including banking, finance, legal services, life sciences & healthcare, technology, media, and the public sector. Check out some of our services:
- Artificial Intelligence
- Big Data
- Web Development
- Mobile Development
- Desktop Development
- API Development
- Database Development
- Cloud
- DevOps
- Enterprise Search
- Blockchain
- Enterprise Architecture
Cazton has expanded into a global company, servicing clients not only across the United States, but in Oslo, Norway; Stockholm, Sweden; London, England; Berlin, Germany; Frankfurt, Germany; Paris, France; Amsterdam, Netherlands; Brussels, Belgium; Rome, Italy; Sydney, Melbourne, Australia; Quebec City, Toronto Vancouver, Montreal, Ottawa, Calgary, Edmonton, Victoria, and Winnipeg as well. In the United States, we provide our consulting and training services across various cities like Austin, Dallas, Houston, New York, New Jersey, Irvine, Los Angeles, Denver, Boulder, Charlotte, Atlanta, Orlando, Miami, San Antonio, San Diego, San Francisco, San Jose, Stamford and others. Contact us today to learn more about what our experts can do for you.